• Howdy! Welcome to our community of more than 130.000 members devoted to web hosting. This is a great place to get special offers from web hosts and post your own requests or ads. To start posting sign up here. Cheers! /Peo, FreeWebSpace.net
managed wordpress hosting

Free JavaScript Code Downloads

Dancing Animation Stars Cursor

One of the many cursor codes in our JavaScript library, this one creates dancing stars animating around your pointers mouse. This cur... [URL="http://www.javascriptbank.com/dancing-animation-stars-cursor.html/en//"]detail at JavaScriptBank.com - 2.000+ free JavaScript codes


How to setup

Step 1: Place JavaScript below in your HEAD section
JavaScript
Code:
<script language="JavaScript">
<!--
/*
Dancing Stars cursor (Submitted by Kurt at kurt.grigg@virgin.net)
Modified and permission granted to Dynamic Drive to feature script in archive
For full source, usage terms, and 100's more DHTML scripts, visit http://dynamicdrive.com
*/

if (document.all){
document.write('<div id="starsDiv" style="position:absolute;top:0px;left:0px">')
for (xy=0;xy<7;xy++)
document.write('<div style="position:relative;width:3px;height:3px;background:#FFFF00;font-size:2px;visibility:visible"></div>')
document.write('</div>')
}

if (document.layers)
{window.captureEvents(Event.MOUSEMOVE);}
var yBase = 200;
var xBase = 200;
var yAmpl = 10;
var yMax = 40;
var step = .2;
var ystep = .5;
var currStep = 0;
var tAmpl=1;
var Xpos = 1;
var Ypos = 1;
var i = 0;
var j = 0;

if (document.all)
{
  function MoveHandler(){
  Xpos = document.body.scrollLeft+event.x;
  Ypos = document.body.scrollTop+event.y;
  }
  document.onmousemove = MoveHandler; 
}

else if (document.layers)
{
  function xMoveHandler(evnt){
  Xpos = evnt.pageX;
  Ypos = evnt.pageY;
  }
  window.onMouseMove = xMoveHandler;
}


function animateLogo() {
if (document.all)
{
 yBase = window.document.body.offsetHeight/4;
 xBase = window.document.body.offsetWidth/4;
}
else if (document.layers)
{
 yBase = window.innerHeight/4 ;
 xBase = window.innerWidth/4;
}

if (document.all)
{
var totaldivs=document.all.starsDiv.all.length
 for ( i = 0 ; i < totaldivs ; i++ )
 {
var tempdiv=document.all.starsDiv.all[i].style
  tempdiv.top = Ypos + Math.cos((20*Math.sin(currStep/20))+i*70)*yBase*(Math.sin(10+currStep/10)+0.2)*Math.cos((currStep + i*25)/10);
  tempdiv.left = Xpos + Math.sin((20*Math.sin(currStep/20))+i*70)*xBase*(Math.sin(10+currStep/10)+0.2)*Math.cos((currStep + i*25)/10);
 }
}

else if (document.layers)
{
 for ( j = 0 ; j < 7 ; j++ ) 
 {
var templayer="a"+j
  document.layers[templayer].top = Ypos + Math.cos((20*Math.sin(currStep/20))+j*70)*yBase*(Math.sin(10+currStep/10)+0.2)*Math.cos((currStep + j*25)/10);
  document.layers[templayer].left =Xpos + Math.sin((20*Math.sin(currStep/20))+j*70)*xBase*(Math.sin(10+currStep/10)+0.2)*Math.cos((currStep + j*25)/10);
 }
}
currStep += step;
setTimeout("animateLogo()", 15);
}
animateLogo();
// -->
</script>

Step 2: Copy & Paste HTML code below in your BODY section
HTML
Code:
<LAYER NAME="a0" LEFT=10 TOP=10 VISIBILITY=SHOW BGCOLOR="#FFFF00" CLIP="0,0,3,3"></LAYER>
<LAYER NAME="a1" LEFT=10 TOP=10 VISIBILITY=SHOW BGCOLOR="#FFFF00" CLIP="0,0,3,3"></LAYER>
<LAYER NAME="a2" LEFT=10 TOP=10 VISIBILITY=SHOW BGCOLOR="#FFFF00" CLIP="0,0,3,3"></LAYER>
<LAYER NAME="a3" LEFT=10 TOP=10 VISIBILITY=SHOW BGCOLOR="#FFFF00" CLIP="0,0,3,3"></LAYER>
<LAYER NAME="a4" LEFT=10 TOP=10 VISIBILITY=SHOW BGCOLOR="#FFFF00" CLIP="0,0,3,3"></LAYER>
<LAYER NAME="a5" LEFT=10 TOP=10 VISIBILITY=SHOW BGCOLOR="#FFFF00" CLIP="0,0,3,3"></LAYER>
<LAYER NAME="a6" LEFT=10 TOP=10 VISIBILITY=SHOW BGCOLOR="#FFFF00" CLIP="0,0,3,3"></LAYER>



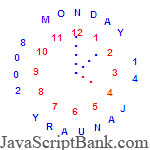
 
Image Rotation with new transition and dissolving effect

This image rotation system creates a dissolving effect for the transition phase. Great for banners, picture-presentations and... detail at JavaScriptBank.com - 2.000+ free JavaScript codes


How to setup

Step 1: Use CSS code below for styling the script
CSS
Code:
<STYLE>
.spanstyle {
	LEFT: 0px; POSITION: absolute; width: 100%; text-align: center;
}
</STYLE>

Step 2: Use JavaScript code below to setup the script
JavaScript
Code:
<SCRIPT>
<!-- Beginning of JavaScript -
// CONFIGURATION:
// 1. 	Copy the two script-blocks:
// 		Paste the first script-block inside the head-section of your HTML-file.
//		Insert the second script-block into the body-section.
// 2. 	Copy the style-block and paste it into the head-section of your HTML-file.
// 3.	Put your images into the same directory as the HTML-file.
//		You may add as many images as you like.
// 4. 	Insert 'onLoad="checkbrowser()"' into the body-tag.
// 5. 	Configure the variables below:
		
// The width of your images (pixels)
var imgwidth=800

// The height of your images (pixels)
var imgheight=250

// The name of your images. You may add as many images as you like.
var imgname=new Array()
imgname[0]="logojs.gif"
imgname[1]="photo1.jpg"
imgname[2]="photo2.jpg"
imgname[3]="photo3.jpg"

// This block will preload your images. Do not edit this block.
var imgpreload=new Array()
for (i=0;i<=imgname.length-1;i++) {
	imgpreload[i]=new Image()
	imgpreload[i].src=imgname[i]
}

// Where should those images be linked to? 
// Add an URL for each image.
// If you don't want to add an URL just write '#' instead of 
// the URL, see sample imgurl[2].
var imgurl=new Array()
imgurl[0]="http://javascriptbank.com"
imgurl[1]="http://www.javascriptbank.com"
imgurl[2]="http://javascriptbank.com"
imgurl[3]="http://www.javascriptbank.com"

// Final horizontal position of the image: distance to the left margin of the window
var x_finalpos=30

// Final vertical position of the image: distance to the top margin of the window
var y_finalpos=30

// Number of sliced cells (the higher this number the slower the visual effect)
var x_slices=10

// Number of sliced rows (the higher this number the slower the visual effect)
var y_slices=8

// Standstill between the images (microseconds)
var pause=2500

// Do not change the variables below
var xy_slices=x_slices*y_slices
var randomorder=new Array()
for (i=0;i<=xy_slices-1;i++) {
	randomorder[i]=i
}

var speed=20
var i_images=0
var width_slice=Math.floor(imgwidth/x_slices)
var height_slice=Math.floor(imgheight/y_slices)

var cliptop=0
var clipbottom=height_slice
var clipleft=0
var clipright=width_slice
var spancounter=0
var x_random=new Array()
var y_random=new Array()
var max_explsteps=15
var i_explsteps=0

function checkbrowser() {
	if (document.all) {
        initiate()
    }
    if (document.layers) {
        rotatenetscape()
    }
}

function initiate() {
    if (document.all) {
        spancounter=0
 	    for (i=0;i<=y_slices-1;i++) {
			for (ii=0;ii<=x_slices-1;ii++) {
				var thisspan=eval("document.all.span"+spancounter+".style")
				thisspan.posLeft=x_finalpos
				thisspan.posTop=y_finalpos
                thisspan.clip ="rect("+cliptop+" "+clipright+" "+clipbottom+" "+clipleft+")"
				clipleft+=width_slice
		        clipright+=width_slice
		        spancounter++
			}
        	clipleft=0
	        clipright=width_slice
	        cliptop+=height_slice
	        clipbottom+=height_slice
		}	
		for (i=0;i<=xy_slices-1;i++) {
			var thisspan=eval("span"+i)
			thisspan.innerHTML="<a href='"+imgurl[i_images]+"'><img src='"+imgname[i_images]+"' border='0'></a>"
		}
		var timer=setTimeout("changeimage()",pause)
   }
}

function dissolveimg() {
	if (i_loop<=xy_slices-1) {
		var thisspan=eval("span"+randomorder[i_loop])
		thisspan.innerHTML="<a href='"+imgurl[i_images]+"'><img src='"+imgname[i_images]+"' border='0'></a>"
		i_loop++
		var timer=setTimeout("dissolveimg()",speed)
	}
	else {
		clearTimeout(timer)	
		var timer=setTimeout("changeimage()",pause)
	}
}

function changeimage() {
	getrandomorder(xy_slices)
	i_loop=0
	i_images++
	if (i_images>=imgname.length) {i_images=0}
   	dissolveimg()
}

function getrandomorder(range) {		
	for (i=0;i<=range;i++) {
		var firstvalue= Math.floor(range*Math.random())
		var secondvalue= Math.floor(range*Math.random())
		var cachevalue=randomorder[firstvalue]
		randomorder[firstvalue]=randomorder[secondvalue]
		randomorder[secondvalue]=cachevalue
	}
}

function rotatenetscape() {
	document.imgcontainer1.document.write("<a href='"+imgurl[i_images]+"'><img src='"+imgname[i_images]+"' border='0'></a>")	
	document.imgcontainer1.document.close()	
	i_images++
	if (i_images>imgname.length-1) {i_images=0}
   	var timer=setTimeout("rotatenetscape()",pause)
}

// - End of JavaScript - -->
</SCRIPT>

Step 3: Copy & Paste HTML code below in your BODY section
HTML
Code:
<BODY onload=checkbrowser()>
<SCRIPT>
<!-- Beginning of JavaScript -
if (document.all) {
	for (i=0;i<=y_slices-1;i++) {
		for (ii=0;ii<=x_slices-1;ii++) {
    		document.write("<div id='span"+spancounter+"' class='spanstyle'>")
    		document.write("</div>")
			spancounter++
		}
	}
}

if (document.layers) {
	document.write("<div id='imgcontainer1' class='spanstyle'>")
	document.write("</div>")
	document.close()
	document.imgcontainer1.left=x_finalpos
	document.imgcontainer1.top=y_finalpos	
}
// - End of JavaScript - -->
</SCRIPT>
</BODY>


Trailing Clock Cursor

Just a neat little trick, cool cursors mouse, a display of date/time around the animated mouse.... detail at JavaScriptBank.com - 2.000+ free JavaScript codes


How to setup

Step 1: Use JavaScript code below to setup the script
JavaScript
Code:
<SCRIPT>
dCol='BLUE';//date colour.
fCol='RED';//face colour.
sCol='BLUE';//seconds colour.
mCol='BLUE';//minutes colour.
hCol='RED';//hours colour.
ClockHeight=40;
ClockWidth=40;
ClockFromMouseY=0;
ClockFromMouseX=100;

//Alter nothing below! Alignments will be lost!

d=new Array("SUNDAY","MONDAY","TUESDAY","WEDNESDAY","THURSDAY","FRIDAY","SATURDAY");
m=new Array("JANUARY","FEBRUARY","MARCH","APRIL","MAY","JUNE","JULY","AUGUST","SEPTEMBER","OCTOBER","NOVEMBER","DECEMBER");
date=new Date();
day=date.getDate();
year=date.getYear();
if (year < 2000) year=year+1900;
TodaysDate=" "+d[date.getDay()]+" "+day+" "+m[date.getMonth()]+" "+year;
D=TodaysDate.split('');
H='...';
H=H.split('');
M='....';
M=M.split('');
S='.....';
S=S.split('');
Face='1 2 3 4 5 6 7 8 9 10 11 12';
font='Arial';
size=1;
speed=0.6; //dieu chinh toc do di chuyen theo mouse
ns=(document.layers);
ie=(document.all);
Face=Face.split(' ');
n=Face.length;
a=size*10;
ymouse=0;
xmouse=0;
scrll=0;
props="<font face="+font+" size="+size+" color="+fCol+"><B>";
props2="<font face="+font+" size="+size+" color="+dCol+"><B>";
Split=360/n;
Dsplit=360/D.length;
HandHeight=ClockHeight/4.5
HandWidth=ClockWidth/4.5
HandY=-7; //di chuyen vi tri kim theo chieu doc
HandX=-2.5; // di chuyen vi tri kim theo chieu ngang
scrll=0;
step=0.06; // dieu chinh toc do xoay cua vong ngay thang, so cang nho toc do cang cham, 0: khong xoay
currStep=0; //xoay diem dat cua vong ngay thang
y=new Array();x=new Array();Y=new Array();X=new Array();
for (i=0; i < n; i++){y[i]=0;x[i]=0;Y[i]=0;X[i]=0}
Dy=new Array();Dx=new Array();DY=new Array();DX=new Array();
for (i=0; i < D.length; i++){Dy[i]=0;Dx[i]=0;DY[i]=0;DX[i]=0}
if (ns){
for (i=0; i < D.length; i++)
document.write('<layer name="nsDate'+i+'" top=0 left=0 height='+a+' width='+a+'><center>'+props2+D[i]+'</font></center></layer>');
for (i=0; i < n; i++)
document.write('<layer name="nsFace'+i+'" top=0 left=0 height='+a+' width='+a+'><center>'+props+Face[i]+'</font></center></layer>');
for (i=0; i < S.length; i++)
document.write('<layer name=nsSeconds'+i+' top=0 left=0 width=15 height=15><font face=Arial size=3 color='+sCol+'><center><b>'+S[i]+'</b></center></font></layer>');
for (i=0; i < M.length; i++)
document.write('<layer name=nsMinutes'+i+' top=0 left=0 width=15 height=15><font face=Arial size=3 color='+mCol+'><center><b>'+M[i]+'</b></center></font></layer>');
for (i=0; i < H.length; i++)
document.write('<layer name=nsHours'+i+' top=0 left=0 width=15 height=15><font face=Arial size=3 color='+hCol+'><center><b>'+H[i]+'</b></center></font></layer>');
}
if (ie){
document.write('<div id="Od" style="position:absolute;top:0px;left:0px"><div style="position:relative">');
for (i=0; i < D.length; i++)
document.write('<div id="ieDate" style="position:absolute;top:0px;left:0;height:'+a+';width:'+a+';text-align:center">'+props2+D[i]+'</B></font></div>');
document.write('</div></div>');
document.write('<div id="Of" style="position:absolute;top:0px;left:0px"><div style="position:relative">');
for (i=0; i < n; i++)
document.write('<div id="ieFace" style="position:absolute;top:0px;left:0;height:'+a+';width:'+a+';text-align:center">'+props+Face[i]+'</B></font></div>');
document.write('</div></div>');
document.write('<div id="Oh" style="position:absolute;top:0px;left:0px"><div style="position:relative">');
for (i=0; i < H.length; i++)
document.write('<div id="ieHours" style="position:absolute;width:16px;height:16px;font-family:Arial;font-size:16px;color:'+hCol+';text-align:center;font-weight:bold">'+H[i]+'</div>');
document.write('</div></div>');
document.write('<div id="Om" style="position:absolute;top:0px;left:0px"><div style="position:relative">');
for (i=0; i < M.length; i++)
document.write('<div id="ieMinutes" style="position:absolute;width:16px;height:16px;font-family:Arial;font-size:16px;color:'+mCol+';text-align:center;font-weight:bold">'+M[i]+'</div>');
document.write('</div></div>')
document.write('<div id="Os" style="position:absolute;top:0px;left:0px"><div style="position:relative">');
for (i=0; i < S.length; i++)
document.write('<div id="ieSeconds" style="position:absolute;width:16px;height:16px;font-family:Arial;font-size:16px;color:'+sCol+';text-align:center;font-weight:bold">'+S[i]+'</div>');
document.write('</div></div>')
}
(ns)?window.captureEvents(Event.MOUSEMOVE):0;
function Mouse(evnt){
ymouse = (ns)?evnt.pageY+ClockFromMouseY-(window.pageYOffset):event.y+ClockFromMouseY;
xmouse = (ns)?evnt.pageX+ClockFromMouseX:event.x+ClockFromMouseX;
}
(ns)?window.onMouseMove=Mouse:document.onmousemove=Mouse;
function ClockAndAssign(){
time = new Date ();
secs = time.getSeconds();
sec = -1.57 + Math.PI * secs/30;
mins = time.getMinutes();
min = -1.57 + Math.PI * mins/30;
hr = time.getHours();
hrs = -1.575 + Math.PI * hr/6+Math.PI*parseInt(time.getMinutes())/360;
if (ie){
Od.style.top=window.document.body.scrollTop;
Of.style.top=window.document.body.scrollTop;
Oh.style.top=window.document.body.scrollTop;
Om.style.top=window.document.body.scrollTop;
Os.style.top=window.document.body.scrollTop;
}
for (i=0; i < n; i++){
 var F=(ns)?document.layers['nsFace'+i]:ieFace[i].style;
 F.top=y[i] + ClockHeight*Math.sin(-1.0471 + i*Split*Math.PI/180)+scrll;
 F.left=x[i] + ClockWidth*Math.cos(-1.0471 + i*Split*Math.PI/180);
 }
for (i=0; i < H.length; i++){
 var HL=(ns)?document.layers['nsHours'+i]:ieHours[i].style;
 HL.top=y[i]+HandY+(i*HandHeight)*Math.sin(hrs)+scrll;
 HL.left=x[i]+HandX+(i*HandWidth)*Math.cos(hrs);
 }
for (i=0; i < M.length; i++){
 var ML=(ns)?document.layers['nsMinutes'+i]:ieMinutes[i].style;
 ML.top=y[i]+HandY+(i*HandHeight)*Math.sin(min)+scrll;
 ML.left=x[i]+HandX+(i*HandWidth)*Math.cos(min);
 }
for (i=0; i < S.length; i++){
 var SL=(ns)?document.layers['nsSeconds'+i]:ieSeconds[i].style;
 SL.top=y[i]+HandY+(i*HandHeight)*Math.sin(sec)+scrll;
 SL.left=x[i]+HandX+(i*HandWidth)*Math.cos(sec);
 }
for (i=0; i < D.length; i++){
 var DL=(ns)?document.layers['nsDate'+i]:ieDate[i].style;
 DL.top=Dy[i] + ClockHeight*1.5*Math.sin(currStep+i*Dsplit*Math.PI/180)+scrll;
 DL.left=Dx[i] + ClockWidth*1.5*Math.cos(currStep+i*Dsplit*Math.PI/180);
 }
currStep-=step;
}
function Delay(){
scrll=(ns)?window.pageYOffset:0;
Dy[0]=Math.round(DY[0]+=((ymouse)-DY[0])*speed);
Dx[0]=Math.round(DX[0]+=((xmouse)-DX[0])*speed);
for (i=1; i < D.length; i++){
Dy[i]=Math.round(DY[i]+=(Dy[i-1]-DY[i])*speed);
Dx[i]=Math.round(DX[i]+=(Dx[i-1]-DX[i])*speed);
}
y[0]=Math.round(Y[0]+=((ymouse)-Y[0])*speed);
x[0]=Math.round(X[0]+=((xmouse)-X[0])*speed);
for (i=1; i < n; i++){
y[i]=Math.round(Y[i]+=(y[i-1]-Y[i])*speed);
x[i]=Math.round(X[i]+=(x[i-1]-X[i])*speed);
}
ClockAndAssign();
setTimeout('Delay()',20);
}
if (ns||ie)window.onload=Delay;

</SCRIPT>
	<!--
    	This script downloaded from www.JavaScriptBank.com
    	Come to view and download over 2000+ free javascript at www.JavaScriptBank.com
	-->


AJAX Navigation Menu

Use this JavaScript instead of frames. When a visitor clicks on a specific link, the content of that link is inserted into the page without a refresh. When a page doesn... detail at JavaScriptBank.com - 2.000+ free JavaScript codes


How to setup

Step 1: Place JavaScript below in your HEAD section
JavaScript
Code:
<script language="javascript">

// Created by: Michael :: http://www.posters-bestellen.nl

var please_wait = null;

function open_url(url, target) {
 	if ( ! document.getElementById) {
  		return false;
 	}

 	if (please_wait != null) {
  		document.getElementById(target).innerHTML = please_wait;
 	}

 	if (window.ActiveXObject) {
  		link = new ActiveXObject("Microsoft.XMLHTTP");
 	} else if (window.XMLHttpRequest) {
  		link = new XMLHttpRequest();
 	}

 	if (link == undefined) {
  		return false;
 	}
 	link.onreadystatechange = function() { response(url, target); }
 	link.open("GET", url, true);
 	link.send(null);
}

function response(url, target) {
 	if (link.readyState == 4) {
	 	document.getElementById(target).innerHTML = (link.status == 200) ? link.responseText : "Ooops!! A broken link! Please contact the webmaster of this website ASAP and give him the fallowing errorcode: " + link.status;
	}
}

function set_loading_message(msg) {
 	please_wait = msg;
}
</script>

Step 2: Place HTML below in your BODY section
HTML
Code:
<script type="text/javascript">
<!--
/* This script and many more are available free online at
Created by: Michael :: http://www.posters-bestellen.nl */

  set_loading_message("Please wait while the page is opening....");
//-->

</script>
<table>
<tr>
<td valign=top width=150>
<H5>My Navagation links</H5>
<a href="javascript:void(0)" onclick="open_url('page-1.html','my_site_content');">
Go to page 1</a><br>
<a href="javascript:void(0)" onclick="open_url('page-2.html','my_site_content');">
Go to page 2</a><br>
<a href="javascript:void(0)" onclick="open_url('page-3.html','my_site_content');">
Go to page 3</a><br>
<a href="javascript:void(0)" onclick="open_url('page-4.html','my_site_content');">
Go to page 4</a><br>

<a href="javascript:void(0)" onclick="open_url('xxxx.html','my_site_content');">
Broken Link</a><br>
</td>
<td valign=top>
<div id="my_site_content">
</div>
</td>
</tr>
</table>


DHTML Fading Animation Image

Enhancing image presentation on your website with this image rotator plus smooth dynamic motion (fade-in-fade-out). A very great anima... detail at JavaScriptBank.com - 2.000+ free JavaScript codes


How to setup

Step 1: Place JavaScript below in your HEAD section
JavaScript
Code:
<SCRIPT language=javaScript>
<!-- Beginning of JavaScript -

sandra0 = new Image();
sandra0.src = "photo1.jpg";

sandra1 = new Image();
sandra1.src = "photo2.jpg";

sandra2 = new Image();
sandra2.src = "photo3.jpg";

var i_strngth=1
var i_image=0

var imageurl = new Array()
imageurl[0] ="photo1.jpg"
imageurl[1] ="photo2.jpg"
imageurl[2] ="photo3.jpg"


function showimage() {		
	if(document.all) {
		if (i_strngth <=110) {
			testimage.innerHTML="<img style='filter:alpha(opacity="+i_strngth+")' src="+imageurl[i_image]+" border=0>";
			i_strngth=i_strngth+10
			var timer=setTimeout("showimage()",100)
		}	
		else {
			clearTimeout(timer)
			var timer=setTimeout("hideimage()",1000)
		}
	}	
	
	if(document.layers) {
			clearTimeout(timer)
			document.testimage.document.write("<img src="+imageurl[i_image]+" border=0>")
			document.close()
			i_image++
			if (i_image >= imageurl.length) {i_image=0}	
			var timer=setTimeout("showimage()",2000)
				
	}	
}


function hideimage() {		
	if (i_strngth >=-10) {
		testimage.innerHTML="<img style='filter:alpha(opacity="+i_strngth+")' src="+imageurl[i_image]+" border=0>";
		i_strngth=i_strngth-10
		var timer=setTimeout("hideimage()",100)
	}	
	else {
		clearTimeout(timer)
		i_image++
		if (i_image >= imageurl.length) {i_image=0}
		i_strngth=1
		var timer=setTimeout("showimage()",500)	
	}
}


// - End of JavaScript - -->
</SCRIPT>

Step 2: Place HTML below in your BODY section
HTML
Code:
<BODY onload=showimage()>
<DIV id=mainbod style="POSITION: relative; VISIBILITY: visible"></DIV>

<DIV id=testimage style="POSITION: relative; VISIBILITY: visible"></DIV>
</BODY>


JavaScript Countdown Timer solution in OOP

This JavaScript code is the new &amp; unique solution to create a countdown timer on your web pages; it's really new in the look of web developers and users. This JavaScript countdown timer is very ea... detail at JavaScriptBank.com - 2.000+ free JavaScript codes


How to setup

Step 1: CSS below for styling thescript, place it into HEAD section
CSS
Code:
<style type="text/css">
    body{
      font-family:arial,sans-serif;
      color:#000;
      background:#fff;
      text-align:center;
    }
    input{
      font-size:20px;
      padding:5px;
      border:none;
      background:#69c;
      margin:0 10px;
    }
    input#c[disabled]{
        background:#eee;
    }
    #display{
        font-weight:bold;
        margin:20px auto;
        width:720px;
        font-size:350px;
    }
    .final{
      color:#c00;
    }
    .over{
      color:#c00;
      text-decoration:blink;
    }
    #preferences{
      margin-top:.5em;
      background:#ccc;
      border-top:1px solid #999;
      padding:2em;
      font-size:1em;
      text-align:left;
    }
    #preferences p {
      width:49%;
      float:left;
      padding:5px 0;
      margin:0;
      position: absolute;
      top: 0px;
    }
    #preferences input{
      font-size:20px;
      padding:5px;
      border:1px solid #999;
      background:#fff;
      margin:0 2px;
    }
    #preferences label{
      padding-top:10px;
      width:30%;
      float:left;
      display:block;
      padding-right:1em;
    }
    #preferences input#set{
      font-size:20px;
      padding:5px;
      width:600px;
      margin:0 auto;
      border:none;
      background:#69c;
      clear:both;
      display:block;
    }
    #preferences input#set:hover{
      background:#ffc;
    }
  </style>

Step 2: Use JavaScript code below to setup the script
JavaScript
Code:
<script>
    countdown = function(){
      /* 
        configuration of script, properties with 
        values and labels will become form elements! 
      */
      var cfg = {
        displayID:'display',
        preferencesID:'preferences',
        finalClass:'final',
        overClass:'over',
        initialText:{
          value:'2:00',
          label:'Initial Text'
        },
        seconds:{
          value:2*60,
          label:'Time in Seconds'
        },
        finalCountdown:{
          value:30,
          label:'Warning start'
        },
        pauseLabel:{
         value:'pause',
         label:'Pause Text' 
        },  
        resumeLabel:{
          value:'resume',
          label:'Resume Text'
        },
        resetLabel:{
          value:'reset',
          label:'Reset Text'
        },
        startLabel:{
          value:'start',
          label:'Start Text'
        }
      };

      /* presets */
      var seconds = cfg.seconds.value;
      var interval = null;
      var secs = null;
      var startTime = null;
      var realsecs = null;

      /* create display */
      var display = document.createElement('div');
      display.id = cfg.displayID;
      document.body.appendChild(display);
      display.innerHTML = cfg.initialText.value;

      /* create form with buttons */
      var form = document.createElement('form');
      document.body.appendChild(form);
      var startButton = createInput('button','startButton',cfg.startLabel.value);
      startButton.onclick = startCountDown;
      form.appendChild(startButton);
      var pauseButton = createInput('button','pauseButton',cfg.pauseLabel.value);
      pauseButton.onclick = pauseCountDown;
      pauseButton.disabled = true;
      form.appendChild(pauseButton);
      var resetButton = createInput('button','resetButton',cfg.resetLabel.value);
      resetButton.onclick = resetCountDown;
      form.appendChild(resetButton);

      /* create preferences panel */
      var preferencesPanel = document.createElement('div');
      preferencesPanel.id = cfg.preferencesID;
      preferencesPanel.style.display = 'none';
      var firstForm = document.getElementsByTagName('form')[0];
      firstForm.appendChild(preferencesPanel);
      var button = createInput('button',null,'preferences');
      button.onclick = togglePreferences;
      preferencesPanel.parentNode.insertBefore(button,preferencesPanel);
      /* create preferences form */
      var prefs = [];
      for (var i in cfg){
        if(cfg[i].value){
          prefs.push(i);
          var p = document.createElement('p');
          p.appendChild(createLabel(cfg[i].label,i));
          p.appendChild(createInput('text',i,cfg[i].value));
          preferencesPanel.appendChild(p);
        }
      }
      var setPreferencesButton = createInput('button','set','set');
      preferencesPanel.appendChild(setPreferencesButton);
      setPreferencesButton.onclick = setPreferences;

      function setPreferences(){
        for(var i=0,j=prefs.length;i<j;i++){
          cfg[prefs[i]].value = document.getElementById(prefs[i]).value;
        }
        resetCountDown();
        preferencesPanel.style.display = 'none';
      }
      function togglePreferences(){
        preferencesPanel.style.display = preferencesPanel.style.display === 'none' ? 'block' : 'none';
      }
      function startCountDown(){
        pauseButton.disabled = false;
        startButton.disabled = true;
        startTime = new Date();
        interval = setInterval(countdown.doCountDown, 100);
      }
      function doCountDown(){
        realsecs = Math.ceil(seconds - (new Date() - startTime) / 1000);
        var mins = parseInt(realsecs / 60);
        var secs = realsecs % 60;
        display.innerHTML = parseInt(mins) + ':'+ (secs < 10 ? '0' : '') +(secs % 60);
        display.className = (realsecs > cfg.finalCountdown.value) ? '' : cfg.finalClass;
        if(realsecs===0){
          display.className = cfg.overClass;
          window.clearTimeout(interval);
        }
      }
      function resetCountDown(){
        window.clearTimeout(interval);
        startButton.disabled = false;
        pauseButton.disabled = true;
        display.innerHTML = cfg.initialText.value;
        interval = null;
        seconds = cfg.seconds.value;
        pauseButton.value = cfg.pauseLabel.value;
        resetButton.value = cfg.resetLabel.value;
        startButton.value = cfg.startLabel.value;
        display.className = '';
      }
      function pauseCountDown(){
        if(pauseButton.value === cfg.pauseLabel.value){
          seconds = realsecs;
          window.clearTimeout(interval);
          pauseButton.value = cfg.resumeLabel.value;
        } else {
          startCountDown();
          pauseButton.value = cfg.pauseLabel.value;
        }
      }
      function createInput(type,id,value){
        var input = document.createElement('input');
        input.value = value;
        input.type = type;
        if(id){
          input.id = id;
        }
        return input;
      }
      function createLabel(text,id){
        var label = document.createElement('label');
        label.appendChild(document.createTextNode(cfg[id].label));
        label.htmlFor = id;
        return label;
      }
      return {doCountDown:doCountDown};
    }();
  </script>


Streaming Horizontal Banner

Use this JavaScript code to make a a horizontal image scroller on your web page. If do not view the source code, maybe you will think tha... detail at JavaScriptBank.com - 2.000+ free JavaScript codes


How to setup

Step 1: CSS below for styling thescript, place it into HEAD section
CSS
Code:
<style type="text/css">
<!--
#slideCont {
 	border:solid 1px #000;
	 text-align:center;
}

#slideCont img {
 	margin: 5px;
}
-->
</style>

Step 2: Place JavaScript below in your HEAD section
JavaScript
Code:
<script type="text/javascript">
<!--
/* 
  -----------------------------------------------
   Streaming banners - v.1
   (c) 2006 www.haan.net
   You may use this script but please leave the credits on top intact.
   Please inform us of any improvements made.
   When usefull we will add your credits.
  ------------------------------------------------ */
<!--

function clip() {
 	// width of the banner container
 	var contWidth = 425;
 	// height of the banner container
 	var contHeight = 90;

 	var id1 = document.getElementById('slideA');
 	var id2 = document.getElementById('slideB');

 	id1.style.left = parseInt(id1.style.left)-1 + 'px';
 	
 	document.getElementById('slideCont').style.width = contWidth + "px";
 	document.getElementById('slideCont').style.clip = 'rect(auto,'+ contWidth +'px,' + contHeight +'px,auto)';
 	id2.style.display = '';
 	if(parseFloat(id1.style.left) == -(contWidth)) 	{
 		id1.style.left = '0px';
 	}
 	setTimeout(clip,25)
}

// Multiple onload function created by: Simon Willison
// http://simonwillison.net/2004/May/26/addLoadEvent/
function addLoadEvent(func) {
  var oldonload = window.onload;
  if (typeof window.onload != 'function') {
    window.onload = func;
  } else {
    window.onload = function() {
      if (oldonload) {
        oldonload();
      }
      func();
    }
  }
}

addLoadEvent(function() {
  clip();
});
//-->
</script>

Step 3: Copy & Paste HTML code below in your BODY section
HTML
Code:
<div id="slideCont" style="overflow: hidden; position: relative; z-index: 1; width: 425px; height: 90px; top: 0px; clip: rect(auto, 425px, 90px, auto);">
	<div id="slideA" style="overflow: hidden; position: absolute; z-index: 1; top: 0px; left: -194px; width: 850px; height: 90px;">
		<div style="float: left;" id="innerSlideA">
			<a href="http://www.apache.org/"><img src="/logos/logo_jsbank.jpg" border="0" height="44" width="126"></a>
			<a href="http://www.haan.net/"><img src="/logos/gif_logojsb2.gif" border="0" height="60" width="120"></a>
			<a href="http://www.mysql.com/"><img src="/logos/jsb_banner.gif" border="0" height="44" width="126"></a>

		</div>
		<div id="slideB" style="overflow: hidden; position: relative; z-index: 1; top: 0px; left: 0px; width: 425px; height: 90px;">
			<a href="http://www.apache.org/"><img src="/logos/logo_jsb.jpg" border="0" height="44" width="126"></a>
			<a href="http://www.haan.net/"><img src="/logos/logo_jsb__88x31.gif" border="0" height="60" width="120"></a>
			<a href="http://www.mysql.com/"><img src="/logos/logo_jsb_120x60.jpg" border="0" height="44" width="126"></a>
		</div>
	</div>
</div>


Expanding Navigation Menu onClick

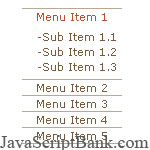
This is a simple expand collapse menu. The anchor tags that expand each menu are added by JavaScript, so the HTML code doesn't contain any event handlers or unnecessary HTML tags. The ... detail at JavaScriptBank.com - 2.000+ free JavaScript codes


How to setup

Step 1: CSS below for styling thescript, place it into HEAD section
CSS
Code:
<style type="text/css">
ul#menu {
  width: 100px;
  list-style-type: none;
  border-top: solid 1px #b9a894;
  margin: 0;
  padding: 0;
}

ul#menu ol {
  display: none;
  text-align: right;
  list-style-type: none;
  margin: 0;
  padding: 5px;
}

ul#menu li, 
  ul#menu a {
  font-family: verdana, sans-serif;
  font-size: 11px;
  color: #785a3c;
}

ul#menu li {
  border-bottom: solid 1px #b9a894;
  line-height: 15px;
}

ul#menu ol li {
  border-bottom: none;
}

ul#menu ol li:before {
  content: "-";
}

ul#menu a {
  text-decoration: none;
  outline: none;
}

ul#menu a:hover {
  color: #539dbc;
}

ul#menu a.active {
  color: #be5028;
}
</style>

Step 2: Place JavaScript below in your HEAD section
JavaScript
Code:
<script language="javascript">

/*
Created by: Travis Beckham :: http://www.squidfingers.com | http://www.podlob.com
version date: 06/02/03 :: If want to use this code, feel free to do so,
but please leave this message intact. (Travis Beckham) */

// Node Functions

if(!window.Node){
  var Node = {ELEMENT_NODE : 1, TEXT_NODE : 3};
}

function checkNode(node, filter){
  return (filter == null || node.nodeType == Node[filter] || node.nodeName.toUpperCase() == filter.toUpperCase());
}

function getChildren(node, filter){
  var result = new Array();
  var children = node.childNodes;
  for(var i = 0; i < children.length; i++){
    if(checkNode(children[i], filter)) result[result.length] = children[i];
  }
  return result;
}

function getChildrenByElement(node){
  return getChildren(node, "ELEMENT_NODE");
}

function getFirstChild(node, filter){
  var child;
  var children = node.childNodes;
  for(var i = 0; i < children.length; i++){
    child = children[i];
    if(checkNode(child, filter)) return child;
  }
  return null;
}

function getFirstChildByText(node){
  return getFirstChild(node, "TEXT_NODE");
}

function getNextSibling(node, filter){
  for(var sibling = node.nextSibling; sibling != null; sibling = sibling.nextSibling){
    if(checkNode(sibling, filter)) return sibling;
  }
  return null;
}
function getNextSiblingByElement(node){
        return getNextSibling(node, "ELEMENT_NODE");
}

// Menu Functions & Properties

var activeMenu = null;

function showMenu() {
  if(activeMenu){
    activeMenu.className = "";
    getNextSiblingByElement(activeMenu).style.display = "none";
  }
  if(this == activeMenu){
    activeMenu = null;
  } else {
    this.className = "active";
    getNextSiblingByElement(this).style.display = "block";
    activeMenu = this;
  }
  return false;
}

function initMenu(){
  var menus, menu, text, a, i;
  menus = getChildrenByElement(document.getElementById("menu"));
  for(i = 0; i < menus.length; i++){
    menu = menus[i];
    text = getFirstChildByText(menu);
    a = document.createElement("a");
    menu.replaceChild(a, text);
    a.appendChild(text);
    a.href = "#";
    a.onclick = showMenu;
    a.onfocus = function(){this.blur()};
  }
}

if(document.createElement) window.onload = initMenu;

</script>

Step 3: Place HTML below in your BODY section
HTML
Code:
<ul id="menu">
  <li>Menu Item 1
    <ol>
      <li><a href="#">Sub Item 1.1</a></li>
      <li><a href="#">Sub Item 1.2</a></li>
      <li><a href="#">Sub Item 1.3</a></li>

    </ol>
  </li>
  <li>Menu Item 2
    <ol>
      <li><a href="#">Sub Item 2.1</a></li>
      <li><a href="#">Sub Item 2.2</a></li>
      <li><a href="#">Sub Item 2.3</a></li>
    </ol>

  </li>
  <li>Menu Item 3
    <ol>
      <li><a href="#">Sub Item 3.1</a></li>
      <li><a href="#">Sub Item 3.2</a></li>
      <li><a href="#">Sub Item 3.3</a></li>
    </ol>
  </li>

  <li>Menu Item 4
    <ol>
      <li><a href="#">Sub Item 4.1</a></li>
      <li><a href="#">Sub Item 4.2</a></li>
      <li><a href="#">Sub Item 4.3</a></li>
    </ol>
  </li>
  <li>Menu Item 5
    <ol>

      <li><a href="#">Sub Item 5.1</a></li>
      <li><a href="#">Sub Item 5.2</a></li>
      <li><a href="#">Sub Item 5.3</a></li>
    </ol>
  </li>
</ul>


Waving Text Trailer

This JavaScript codecan be used to be that a mouse cursor pointer was just a mouse cursor. Since DHTML came along and gave programmers the ability to track the precise coordinates of the mouse, it was... detail at JavaScriptBank.com - 2.000+ free JavaScript codes


How to setup

Step 1: CSS below for styling thescript, place it into HEAD section
CSS
Code:
<STYLE>.spanstyle {
	FONT-WEIGHT: bold; FONT-SIZE: 10pt; COLOR: black; FONT-FAMILY: Verdana; POSITION: absolute; TOP: -50px
}
</STYLE>

Step 2: Copy & Paste JavaScript code below in your HEAD section
JavaScript
Code:
<SCRIPT>

/*
Cursor Trailor Text- By Peter Gehrig (http://www.24fun.ch/)
Permission given to Dynamicdrive.com to feature script in it's archive.
*/

var moves=17
var tracker=0
var xpos
var ypos
var cursortext='JavaScriptBank.com - Bank of over 2000+ free JavaScript'
cursortext=cursortext.split("")

function setup() {
	if (tracker==1 && document.all) {
    	for (i=cursortext.length-1; i>=1; i--) {
   			xposition[i]=xposition[i-1]+moves
			yposition[i]=yposition[i-1]
    	}
		xposition[0]=xpos+moves
		yposition[0]=ypos
	
		for (i=0; i<cursortext.length-1; i++) {
    		var thisspan = eval("span"+(i)+".style")
    		thisspan.posLeft=xposition[i]
			thisspan.posTop=yposition[i]
    	}
	}
	
	else if (tracker==1 && document.layers) {
    	for (i=cursortext.length-1; i>=1; i--) {
   			xposition[i]=xposition[i-1]+moves
			yposition[i]=yposition[i-1]
    	}
		xposition[0]=xpos+moves
		yposition[0]=ypos
	
		for (i=0; i<cursortext.length-1; i++) {
    		var thisspan = eval("document.span"+i)
    		thisspan.left=xposition[i]
			thisspan.top=yposition[i]
    	}
	}
		var timer=setTimeout("setup()",40)
}

function MouseMovement(e)
{
	xpos = (document.layers) ? e.pageX : document.body.scrollLeft+event.clientX
	ypos = (document.layers) ? e.pageY : document.body.scrollTop+event.clientY
	tracker=1
}

var xposition=new Array()
for (i=0;i<=cursortext.length-1;i++) {
	xposition[i]=-50
}

var yposition=new Array()
for (i=0;i<=cursortext.length-1;i++) {
	yposition[i]=-50
}

/*hieu ung di chuyen chuot*/

for (i=0;i<=cursortext.length-1;i++) {
    document.write("<span id='span"+i+"' class='spanstyle'>")
	document.write(cursortext[i])
    document.write("</span>")
}

if (document.layers){
	document.captureEvents(Event.MOUSEMOVE);
}
document.onmousemove = MouseMovement;
</SCRIPT>

Step 3: Copy & Paste HTML code below in your BODY section
HTML
Code:
<BODY onload=setup()>
</body>


Trailing Kisses and Lips

Spreading the love on your site with this JavaScript! It produces big kisses and lips behind your mouse pointer as it moves, each disappearing only after a noticeable delay (set to 1 second in demo). ... detail at JavaScriptBank.com - 2.000+ free JavaScript codes


How to setup

Step 1: Place CSS below in your HEAD section
CSS
Code:
<style type="text/css">
<!--
h1 {
  color:#cc3333;
  font-family:"Comic Sans MS",Helvetica;
}
h3 {
  color:#993333;
  font-family:"Comic Sans MS",Helvetica;
}
.kisser {
  position:absolute;
  top:0;
  left:0;
  visibility:hidden;
}
-->
</style>

Step 2: Use JavaScript code below to setup the script
JavaScript
Code:
<script language="JavaScript1.2" type="text/JavaScript">
<!-- cloak
//Kissing trail- By dij8 (dij8@dij8.com)
//Modified by Dynamic Drive for bug fixes
//Visit http://www.dynamicdrive.com for this script

kisserCount = 15 //maximum number of images on screen at one time
curKisser = 0 //the last image DIV to be displayed (used for timer)
kissDelay = 1000 //duration images stay on screen (in milliseconds)
kissSpacer = 50 //distance to move mouse b4 next heart appears
theimage = "lips_small.gif" //the 1st image to be displayed
theimage2 = "small_heart.gif" //the 2nd image to be displayed


//Browser checking and syntax variables
var docLayers = (document.layers) ? true:false;
var docId = (document.getElementById) ? true:false;
var docAll = (document.all) ? true:false;
var docbitK = (docLayers) ? "document.layers['":(docId) ? "document.getElementById('":(docAll) ? "document.all['":"document."
var docbitendK = (docLayers) ? "']":(docId) ? "')":(docAll) ? "']":""
var stylebitK = (docLayers) ? "":".style"
var showbitK = (docLayers) ? "show":"visible"
var hidebitK = (docLayers) ? "hide":"hidden"
var ns6=document.getElementById&&!document.all
//Variables used in script
var posX, posY, lastX, lastY, kisserCount, curKisser, kissDelay, kissSpacer, theimage
lastX = 0
lastY = 0
//Collection of functions to get mouse position and place the images
function doKisser(e) {

  posX = getMouseXPos(e)
  posY = getMouseYPos(e)
  if (posX>(lastX+kissSpacer)||posX<(lastX-kissSpacer)||posY>(lastY+kissSpacer)||posY<(lastY-kissSpacer)) {
    showKisser(posX,posY)
    lastX = posX
    lastY = posY
  }
}
// Get the horizontal position of the mouse
function getMouseXPos(e) {
  if (document.layers||ns6) {
    return parseInt(e.pageX+10)
  } else {
    return (parseInt(event.clientX+10) + parseInt(document.body.scrollLeft))
  }
}
// Get the vartical position of the mouse
function getMouseYPos(e) {
  if (document.layers||ns6) {
    return parseInt(e.pageY)
  } else {
    return (parseInt(event.clientY) + parseInt(document.body.scrollTop))
  }
}
//Place the image and start timer so that it disappears after a period of time
function showKisser(x,y) {
  var processedx=ns6? Math.min(x,window.innerWidth-75) : docAll? Math.min(x,document.body.clientWidth-55) : x
  if (curKisser >= kisserCount) {curKisser = 0}
  eval(docbitK + "kisser" + curKisser + docbitendK + stylebitK + ".left = " + processedx)
  eval(docbitK + "kisser" + curKisser + docbitendK + stylebitK + ".top = " + y)
  eval(docbitK + "kisser" + curKisser + docbitendK + stylebitK + ".visibility = '" + showbitK + "'")
  if (eval("typeof(kissDelay" + curKisser + ")")=="number") {
    eval("clearTimeout(kissDelay" + curKisser + ")")
  }
  eval("kissDelay" + curKisser + " = setTimeout('hideKisser(" + curKisser + ")',kissDelay)")
  curKisser += 1
}
//Make the image disappear
function hideKisser(knum) {
  eval(docbitK + "kisser" + knum + docbitendK + stylebitK + ".visibility = '" + hidebitK + "'")
}

function kissbegin(){
//Let the browser know when the mouse moves
if (docLayers) {
  document.captureEvents(Event.MOUSEMOVE)
  document.onMouseMove = doKisser
} else {
  document.onmousemove = doKisser
}
}
window.onload=kissbegin
// decloak -->
</script>

Step 3: Copy & Paste HTML code below in your BODY section
HTML
Code:
<script language="JavaScript" type="text/JavaScript">
<!-- cloak
// Add all DIV's of hearts
if (document.all||document.getElementById||document.layers){
for (k=0;k<kisserCount;k=k+2) {
  document.write('<div id="kisser' + k + '" class="kisser"><img src="' + theimage + '" alt="" border="0"></div>n')
  document.write('<div id="kisser' + (k+1) + '" class="kisser"><img src="' + theimage2 + '" alt="" border="0"></div>n')
}
}

// decloak -->
</script>

Step 4: must download files below
Files
lips_small.gif
small_heart.gif


Slideshow with zoom-in-zoom-out-animation

Slideshow with great transitoon effect. Each image has a JavaScript link of its own. Netscape-users will see a simple image-rotation-ef... detail at JavaScriptBank.com - 2.000+ free JavaScript codes


How to setup

Step 1: Copy & Paste HTML code below in your BODY section
HTML
Code:
<BODY onload=initiate()>
<SCRIPT>
<!-- Beginning of JavaScript -
// Slideshow with zoom-in-zoom-out-animation

// CONFIGURATION:
// 1.	Create your images (gif or jpg). They should have the same width. 
// 		Put those images in the same directory as the HTML-file. 
//		You can add as many images as you like.
// 2.	Copy the script-block and paste it into head-section of your HTML-file..
// 3. 	Copy the span-blocks with the id "imgcontainer" into the body-section 
//      of your HTML-file.
// 4.	Insert 'onLoad="initiate()"' into the body tag.
// 5.	Configure the varibales below.
		
// The width of your images (pixels). All pictures should have the same width.
var imgwidth=256

// The horizontal and vertical position of the images (pixels). 
var pos_left=10
var pos_top=10

// The name of your images. You may add as many images as you like.
var imgname=new Array()
imgname[0]="logojs.gif"
imgname[1]="photo3.jpg"
imgname[2]="photo4.jpg"

// Where should those images be linked to? 
// Add an URL for each image.
// If you don't want to add an URL just write '#' instead of the URL.
var imgurl=new Array()
imgurl[0]="http://javascriptbank.com"
imgurl[1]="http://javascriptbank.com"
imgurl[2]="http://javascriptbank.com"

// This block will preload your images. Do not edit this block.
var imgpreload=new Array()
for (i=0;i<=imgname.length-1;i++) {
	imgpreload[i]=new Image()
	imgpreload[i].src=imgname[i]
}

// Standstill-time between the images (microseconds).
var pause=2000

// Speed of the stretching and shrinking effect. More means slower.
var speed=20

// This variable also affects the speed (the length of the step between each inmage-frame measured in pixels). More means faster.
var step=10

// Do not edit the variables below
var i_loop=0
var i_image=0

function stretchimage() {
	if (i_loop<=imgwidth) {
		if (document.all) {
			imgcontainer.innerHTML="<a href='"+imgurl[i_image]+"' target='_blank'><img width='"+i_loop+"' src='"+imgname[i_image]+"' border='0'></a>"

		}
		i_loop=i_loop+step
		var timer=setTimeout("stretchimage()",speed)
  	}
	else {
		clearTimeout(timer)
		var timer=setTimeout("shrinkimage()",pause)
	}
}

function shrinkimage() {
	if (i_loop>-step) {
		if (document.all) {
			imgcontainer.innerHTML="<a href='"+imgurl[i_image]+"' target='_blank'><img width='"+i_loop+"' src='"+imgname[i_image]+"' border='0'></a>"

		}
		i_loop=i_loop-step
		var timer=setTimeout("shrinkimage()",speed)
  	}
	else {
		clearTimeout(timer)
		changeimage()
	}
}

function changeimage() {
	i_loop=0
	i_image++
	if (i_image>imgname.length-1) {i_image=0}
   	var timer=setTimeout("stretchimage()",pause)
}

function initiate() {
	if (document.all) {
		document.all.imgcontainer.style.posLeft=pos_left
		document.all.imgcontainer.style.posTop=pos_top
		changeimage()
	}
	if (document.layers) {
		document.imgcontainer.left=pos_left
		document.imgcontainer.top=pos_top
		rotatenetscape()
	}
}

function rotatenetscape() {
	document.imgcontainer.document.write("<a href='"+imgurl[i_image]+"' target='_blank'><img src='"+imgname[i_image]+"' border='0'></a>")	
	document.imgcontainer.document.close()	
	i_image++
	if (i_image>imgname.length-1) {i_image=0}
   	var timer=setTimeout("rotatenetscape()",pause*2)
}

document.write("<div id=\"roof\" style=\"position:relative\">")

document.write("<div id=\"imgcontainer\" style=\"position:absolute;top:0px;left:0px\"></div>")
document.write("</div>")

// - End of JavaScript - -->

</SCRIPT>
</BODY>
	<!--
    	This script downloaded from www.JavaScriptBank.com
    	Come to view and download over 2000+ free javascript at www.JavaScriptBank.com
	-->


Back
Top